car window tinting cost

How Much Does Car Window Tinting Cost in Utah?

The cost to tint your car windows in Utah generally ranges from $150 to $400, depending on the type of vehicle and the quality of tint you choose. This price covers everything from standard dyed tints to higher-end options like ceramic and carbon tints.


A common problem many car owners face is not knowing which tint option provides the best value for their money. With so many choices, it’s easy to feel overwhelmed and end up with a tint that doesn’t meet your expectations.


In this blog, we’ll guide you through the average costs, explain the factors that can affect pricing, and compare professional versus DIY tinting options. By the end, you’ll have a clear picture of what to expect and how to make the best decision for your vehicle.


What is the Average Cost of Window Tinting in Utah?


When you're looking to tint your car windows in Utah, it's helpful to know what you might expect to pay. On average, the cost to tint your car windows ranges from $150 to $400. This price can vary based on factors like the type of vehicle, the number of windows, and the type of tint you choose.


Average Cost to Tint a Sedan


For a standard sedan, the cost typically falls between $150 and $250. This price generally covers all windows, including the rear windshield, and uses a standard dyed tint.


Average Cost to Tint an SUV


If you drive an SUV, expect to pay a bit more, with prices ranging from $200 to $350. SUVs have more windows and larger surface areas, which increase the amount of tint material and labor required.


Average Cost to Tint a Truck


Trucks usually fall on the higher end of the spectrum, costing anywhere from $250 to $400. This range can vary depending on the size of the truck and whether you choose a more advanced tint like ceramic or carbon.


Knowing these average costs allows you to budget effectively and helps ensure you’re not caught off guard by unexpected expenses when tinting your car windows.


What Factors Affect the Cost to Tint Car Windows?


The cost to tint your car windows isn’t one-size-fits-all. Several factors can influence the price, making it important to understand what goes into the final cost.


Type of Window Tint


One of the biggest factors affecting the cost is the type of window tint you choose. There are several types, ranging from standard dyed tints to more advanced options like ceramic and carbon tints.


Are there different price ranges for different types of tint?


Yes, there are. Dyed window tints are usually the most affordable, while ceramic and carbon tints can cost significantly more due to their superior heat rejection and durability. For instance, a basic dyed tint might cost you around $150 for an entire car, whereas ceramic tints can push the price up to $400 or more.


Number of Windows


The number of windows you want to tint also plays a role in the cost. More windows mean more material and labor, which naturally increases the price.


How much does window tinting cost per window?


On average, you can expect to pay between $25 to $50 per window. This cost varies based on the size of the window and the type of tint chosen. Larger windows or those with complex shapes might cost more to tint.


Type of Vehicle


The type of vehicle you drive also affects the overall tinting cost. As mentioned earlier, larger vehicles like SUVs and trucks usually require more material and labor, which increases the price compared to smaller vehicles like sedans.


Understanding these factors helps you get a clearer picture of what to expect when you’re planning to tint your car windows, allowing you to make informed decisions based on your specific needs and budget.


What are the Different Types of Car Window Tints?


Choosing the right type of window tint for your car can significantly impact both the performance and the cost. Here are the most common types of car window tints available:


Dyed Window Tint


Dyed window tint is the most basic and affordable option. It uses multiple layers of dye to absorb sunlight and reduce the amount of heat that enters your car. While it’s effective at blocking out light, it doesn’t offer as much UV protection as other types. Dyed tints can fade over time, which may require replacement sooner than other options.


Ceramic Window Tint


Ceramic window tint is a premium option known for its excellent heat and UV ray rejection. Unlike dyed tints, ceramic tints don’t contain any metal, so they won’t interfere with electronic signals like GPS or cell phone reception. Ceramic tints are more durable and maintain their effectiveness longer, but they come at a higher price point.


Carbon Window Tint


Carbon window tint is another high-quality option that provides better UV protection and heat rejection compared to dyed tints. The carbon particles in the tint give it a matte finish, reducing glare and improving the overall appearance of your car. Carbon tints are also fade-resistant, offering long-term durability. However, they are generally more expensive than dyed tints, though typically less costly than ceramic tints.


Understanding these options can help you choose the best tint for your needs, balancing performance with your budget.


How Much Does It Cost to Tint Car Windows Professionally?


Opting for professional window tinting can ensure a high-quality finish that lasts longer, but it also comes with a higher price tag. The cost to have your car windows professionally tinted typically ranges from $200 to $500, depending on the type of tint and the vehicle.


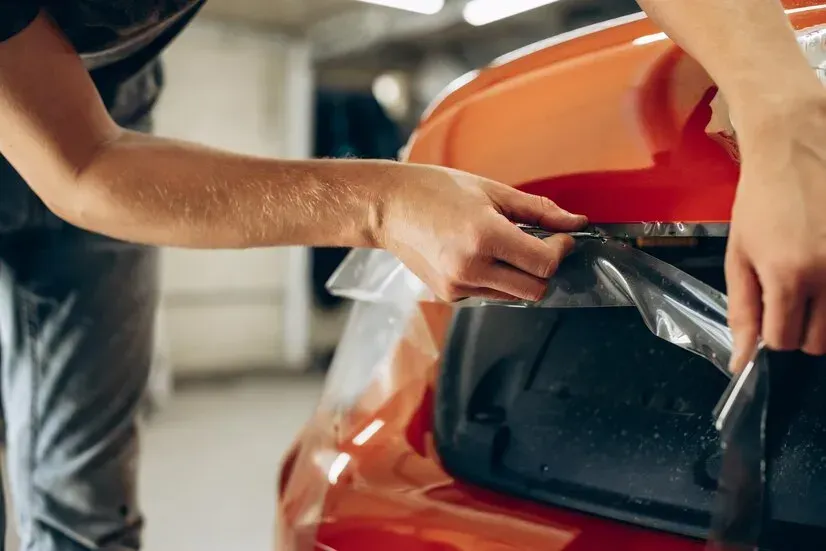
What are the benefits of professional tint installation?


There are several advantages to having your car windows tinted by a professional. First, professionals have the experience and tools necessary to apply the tint smoothly without bubbles or creases. This results in a more polished appearance and better overall performance.


Professional installation also usually comes with a warranty, which can cover issues like peeling, fading, or bubbling. This gives you peace of mind knowing that if something goes wrong, you're covered. Additionally, professionals are knowledgeable about local tint laws and can ensure your car stays within legal limits.


How long does a professional tint job take?


The time it takes to complete a professional tint job can vary depending on the size of the vehicle and the number of windows being tinted. On average, it takes about 2 to 4 hours to tint an entire car. This includes cleaning the windows, cutting the tint film to size, and applying it carefully to avoid any imperfections.


Choosing professional installation might cost more upfront, but the quality and longevity of the tint can make it a worthwhile investment.


DIY Car Window Tint Cost


If you’re considering a do-it-yourself approach, tinting your car windows can be a more budget-friendly option. However, it’s important to weigh the costs and challenges before diving in.


DIY Car Window Tint Pros and Cons


Pros


  • Cost Savings: DIY window tint kits are much cheaper than professional installation. You can find kits ranging from $50 to $100, depending on the quality of the tint film.
  • Flexibility: You can work on your own schedule without needing to book an appointment.
  • Learning Experience: Tinting your own windows can be a rewarding project, especially if you enjoy hands-on work.


Cons


  • Difficulty Level: Applying tint can be tricky, especially for beginners. Achieving a smooth, bubble-free finish requires patience and precision.
  • Quality of Results: DIY results often don’t match the professional finish. Mistakes like air bubbles, creases, or misaligned film are common.
  • No Warranty: Unlike professional installations, DIY tint jobs typically don’t come with a warranty, meaning you’ll need to fix any issues yourself or pay for a re-do.


While DIY tinting can save money upfront, it’s important to consider whether you have the time, tools, and patience to do the job right.


Cost Comparison: DIY vs. Professional


When deciding between DIY and professional window tinting, the cost is a major factor, but it's also important to consider the value you get for your money.


DIY Window Tinting


  • Cost: $50 to $100 for a complete DIY kit.
  • Value: While the initial cost is low, the quality of the tint job can be hit or miss. Without experience, you might end up with bubbles, creases, or peeling edges. If mistakes are made, fixing them can be costly, potentially negating any savings.
  • Time: DIY tinting can take several hours or even a full day, depending on your skill level and the number of windows you’re tinting.


Professional Window Tinting


  • Cost: $200 to $500 depending on the type of tint and vehicle.
  • Value: Although more expensive, professional tinting provides a higher-quality finish that’s backed by a warranty. Professionals ensure that the tint is applied smoothly and evenly, with no bubbles or creases, and they also adhere to local tinting laws.
  • Time: Professional tinting usually takes 2 to 4 hours, much less time than a DIY job, and you won’t have to worry about making mistakes.


In the end, while DIY tinting might save you money upfront, professional installation offers better long-term value with a higher quality finish and peace of mind.


What Is Included in the Window Tinting Prices?


When you’re evaluating the cost of window tinting, it’s important to know what’s included in the price to avoid any surprises down the road. Here’s a breakdown of what you can typically expect to be covered.


Does the warranty affect the overall price of window tint?


Yes, the warranty can significantly affect the price. Many professional tinting services include a warranty in their pricing, which covers issues like bubbling, peeling, and fading for a set period, often ranging from 1 year to a lifetime. Tints with longer warranties or those backed by well-known brands generally cost more, but they offer better long-term value and peace of mind.


Are there additional costs for tint installation?


In most cases, the quoted price for professional window tinting includes the cost of materials and labor. However, there could be additional costs depending on your vehicle’s condition and specific requests:


  • Old Tint Removal: If your car has existing tint that needs to be removed, this can add to the overall cost. Removal fees typically range from $50 to $100, depending on the difficulty of the job.
  • Complex Windows: Some cars have windows with unusual shapes or sizes, which might require custom cutting of the tint film. This can also increase the cost slightly.
  • Premium Tint Options: If you choose a higher-end tint, such as ceramic or carbon, this will naturally increase the price. These tints offer better performance but come at a premium.


Understanding what’s included in the price and any potential extras helps you avoid unexpected charges and ensures you get the best value for your investment.


Conclusion


Window tinting is a smart investment for your vehicle, offering benefits like increased privacy, reduced glare, and protection from UV rays. Whether you choose a DIY approach or opt for professional installation, understanding the costs involved will help you make the best decision for your needs.


If you’re looking for top-quality window tinting services in Utah, Veteran Detail is here!


Serving areas like Utah County, American Fork, Pleasant Grove, Orem, Provo, Alpine, Highland, Lehi, and Saratoga Springs, Veteran Detail offers a range of services, including Car Detailing, Paint Protection Film, Ceramic Coating, Classic Car Detailing, and Black Ops. Their expertise ensures your car will not only look great but will also be protected for the long haul.


Ready to enhance your vehicle with professional window tinting? Contact Veteran Detail today to schedule your appointment and experience the best in the business.


March 11, 2025
Does PPF Affect Car Resale Value in UT? (Investment Benefits for Luxury & Exotic Cars)
pff removal ut
March 11, 2025
If you've invested in Paint Protection Film (PPF) for your vehicle, you might wonder what happens when it's time for a change. Maybe your PPF is showing signs of wear, or perhaps you're selling your car and want to remove it first. Yes, PPF can be safely removed without damaging your vehicle's paint when done correctly. The removal process involves carefully heating the film, slowly peeling it away from the surface, and cleaning any remaining adhesive residue. While DIY removal is possible, professional removal is recommended to avoid paint damage, especially for older installations or lower-quality films. Understanding when and how to remove PPF is important for every vehicle owner who has this protection. In this guide, we'll walk you through everything you need to know about PPF removal, when it's time to replace your film, and how to get it done right the first time. What Is PPF and How Long Does It Last? Paint Protection Film (PPF) is a clear, thermoplastic urethane film applied to the painted surfaces of a vehicle to protect against stone chips, bug stains, scratches, and other minor abrasions. Think of it as a thick, invisible shield that takes the hits instead of your paint. Most quality PPF products are designed to last between 5-10 years, depending on: The quality of the film used How well it was installed Your driving conditions How you maintain your vehicle Climate and sun exposure Top brands like XPEL, 3M, and SunTek typically offer warranties ranging from 5-10 years. However, even the best PPF will eventually show signs of aging like yellowing, haziness, or edge lifting. Signs It's Time to Remove or Replace Your PPF Visual Indicators Your PPF is telling you it's time for replacement when you notice: Yellowing or discoloration Cloudiness or haziness Cracking or peeling edges Bubbles that won't go away Scratches or stains that have penetrated the film These changes happen gradually as the film ages, but when they become noticeable, it's usually time for replacement. Age Considerations Even if your PPF looks good, consider replacement when: It's been 7-10 years since installation You're planning to sell your vehicle (new PPF can be a selling point) You want to upgrade to a newer, better quality film You've moved to a harsher climate that requires better protection Think of PPF like your vehicle's sunscreen – it breaks down over time and needs to be reapplied for continued protection. Professional vs. DIY PPF Removal The Case for Professional Removal Professional PPF removal offers several advantages: Technicians have specialized tools and heat guns They understand different adhesive types They can spot and prevent potential paint damage The job is usually completed in 2-4 hours Most shops include cleaning and paint inspection At Veteran Detai l in Utah County, our technicians have removed hundreds of PPF installations and know exactly how to handle even the trickiest situations without damaging your paint. DIY Removal: Is It Possible? Yes, you can remove PPF yourself, but consider: It requires patience and the right tools Mistakes can damage your paint Older films are harder to remove You'll need several hours, especially for first-timers If you decide to try DIY removal, we'll cover the step-by-step process below. But remember that professional removal usually costs $200-$500 – often less than fixing a DIY mistake. The Professional PPF Removal Process What to Expect When you bring your vehicle to a professional detailer for PPF removal, the process typically involves: Inspection : The technician examines the condition of your PPF, its age, and the type of film to plan the removal approach. Preparation : The vehicle is washed thoroughly to remove dirt that could scratch the paint during removal. Controlled heating : Using professional heat guns, the technician warms sections of the film to loosen the adhesive. Careful peeling : The film is removed slowly at a specific angle to prevent adhesive transfer to the paint. Adhesive removal : Any remaining adhesive is dissolved using safe solvents and cleaned completely. Paint inspection : The paint is checked for any issues that might have been hidden under the film. Surface cleaning : A final clean ensures no residue remains before new protection is applied. The entire process takes 2-4 hours for most vehicles, depending on how much film needs to be removed. DIY PPF Removal: Step-by-Step Guide Tools You'll Need Heat gun or hair dryer Plastic scraper or old credit card Isopropyl alcohol (91% or higher) Microfiber towels Adhesive remover (like 3M Adhesive Remover) Spray bottle with warm soapy water Patience – lots of it Step-by-Step Process If you decide to remove PPF yourself, follow these steps: Wash your car thoroughly to remove all dirt and debris. Heat a small section of the film using your heat gun or hairdryer. Keep it moving to avoid overheating one spot. The ideal temperature is warm, not hot – about 80-90°F. Find an edge of the film and gently lift it using your fingernail or plastic scraper. The corner edges are usually good starting points. Pull slowly at a 45-degree angle, continuing to heat the film just ahead of where you're pulling. Too fast or too steep an angle increases the risk of adhesive transfer. If resistance increases or the film starts to stretch or tear, apply more heat. Remove adhesive residue with isopropyl alcohol or a dedicated adhesive remover. Apply with a microfiber towel and rub gently. Work in small sections – about 1-2 square feet at a time. For stubborn areas , spray warm soapy water underneath the film as you pull to help release the adhesive. Take breaks if needed. This is not a race, and rushing increases the risk of damage. After complete removal , wash the car again and inspect for any remaining adhesive. This process typically takes 3-6 hours for a DIY first-timer, depending on the size of the vehicle and the condition of the film. Common PPF Removal Challenges and Solutions Dealing with Aged or Low-Quality Film Older PPF (5+ years) or lower quality films often present these challenges: More brittle film that breaks during removal Stronger adhesive bond to the paint Increased likelihood of adhesive transfer Solutions: Use more heat, but be careful not to overheat Pull more slowly and at a shallower angle Use a steamer in addition to a heat gun for stubborn areas Consider professional removal if it's breaking into small pieces Adhesive Residue Issues Even after film removal, sticky adhesive might remain: Use dedicated adhesive removers like 3M Adhesive Remover Try a clay bar treatment for stubborn spots IPA (Isopropyl Alcohol) works for light residue Avoid household cleaners that might damage paint Preventing and Addressing Paint Damage To prevent damage during removal: Never use metal scrapers or razor blades Don't pull the film straight up (90° angle) Avoid excessive heat in one spot Don't rush the process If paint damage occurs: Stop immediately and consult a professional Minor scratches might be fixable with polishing Deep scratches may require professional paint correction After PPF Removal: What's Next? Inspecting Your Paint After removing PPF, carefully check your paint for: Uneven coloration or fading differences Scratches or chips that were under the film Water spots or etching Areas that might need paint correction A professional detailer can help assess any issues and recommend solutions. Paint Correction Options Your paint might need some attention after PPF removal: Light polishing to even out minor imperfections Paint correction for more significant issues Ceramic coating as a new protection option Re-application of new PPF At Veteran Detail , we offer complete paint assessment and correction services to restore your vehicle's appearance after PPF removal. Choosing New Protection After removing old PPF, consider these protection options: New, higher-quality PPF (brands like XPEL or SunTek) Ceramic coating for easier maintenance A combination of PPF on high-impact areas and ceramic coating elsewhere Specialized protection like our Black Ops package for black vehicles FAQ About PPF Removal Will removing PPF damage my paint? When removed properly, PPF should not damage your paint. However, improper removal techniques, using the wrong tools, or removing very old film increases the risk of damage. Professional removal is the safest option. How much does professional PPF removal cost? Professional PPF removal typically costs between $200-$500 depending on: How much film needs to be removed The age and condition of the film Your vehicle's size Your location Whether you're getting new protection applied afterward Can I remove just part of my PPF? Yes, partial removal is possible, but it can create visible lines where protected and unprotected paint meet. The newly exposed paint might also look different from the surrounding areas due to age and sun exposure differences. How do I know if my PPF needs replacing rather than just cleaning? Replace your PPF if you notice: Yellowing that doesn't improve with cleaning Persistent haziness or cloudiness Bubbles that won't go away Edges lifting or peeling Tears or holes in the film It's approaching or past the manufacturer's warranty period Can new PPF be applied immediately after removal? Yes, new PPF can be applied immediately after old film is removed, as long as: All adhesive residue has been completely cleaned The paint surface is properly prepped Any necessary paint correction has been completed The surface is thoroughly decontaminated Conclusion PPF can definitely be removed safely when the proper techniques and tools are used. Whether your film has reached the end of its life or you're preparing to upgrade to newer technology, knowing how to remove PPF correctly ensures your paint stays protected throughout the process. While DIY removal is possible, professional removal offers peace of mind and reduces the risk of expensive mistakes. Ready for Expert PPF Removal? Trust Veteran Detail! Don't risk your vehicle's perfect paint with amateur PPF removal! At Veteran Detail in Utah County, our certified technicians have safely removed and replaced PPF on hundreds of vehicles – from daily drivers to exotic supercars. We offer complete PPF solutions including: Safe, damage-free film removal Professional paint correction Premium new PPF installation Ceramic coating options Specialized Black Ops packages for black vehicles Our military-grade attention to detail means your vehicle gets the respect and care it deserves. Your vehicle protected our country's veterans – now let us protect your vehicle!
A red truck is parked in front of a veteran detail paint protection film and ceramic coating studio
February 3, 2025
Ceramic Coating Cost in Utah: What You Need to Know
A white cadillac is parked in a grassy field with mountains in the background.
January 3, 2025
The Benefits of Classic Car Detailing: Preserving Value and Timeless Appeal
A gray mustang is parked in front of a building that says veteran detail
December 9, 2024
Why Paint Protection Film is Essential for Cars in Utah
A black dodge challenger is parked in front of veteran detail
November 21, 2024
How Window Tinting Protects Your Car’s Interior and Boosts Comfort
paint protective film
October 25, 2024
Protect your car with Paint Protection Film. Prevent scratches, UV damage, and chemicals while keeping the original look. Discover the advantages of PPF today!
A white porsche taycan is parked in front of a car dealership.
September 26, 2024
How Long Does PPF Last | When Should You Replace Paint Protection Film
A red honda civic r is parked in front of a building
July 22, 2024
How Much Does PPF Cost?
car detailing cost
June 27, 2024
How Much Does Car Detailing Cost in American Fork? - Veteran Detail
More Posts
Share by: